How to Assemble Your Log Kayak Rack
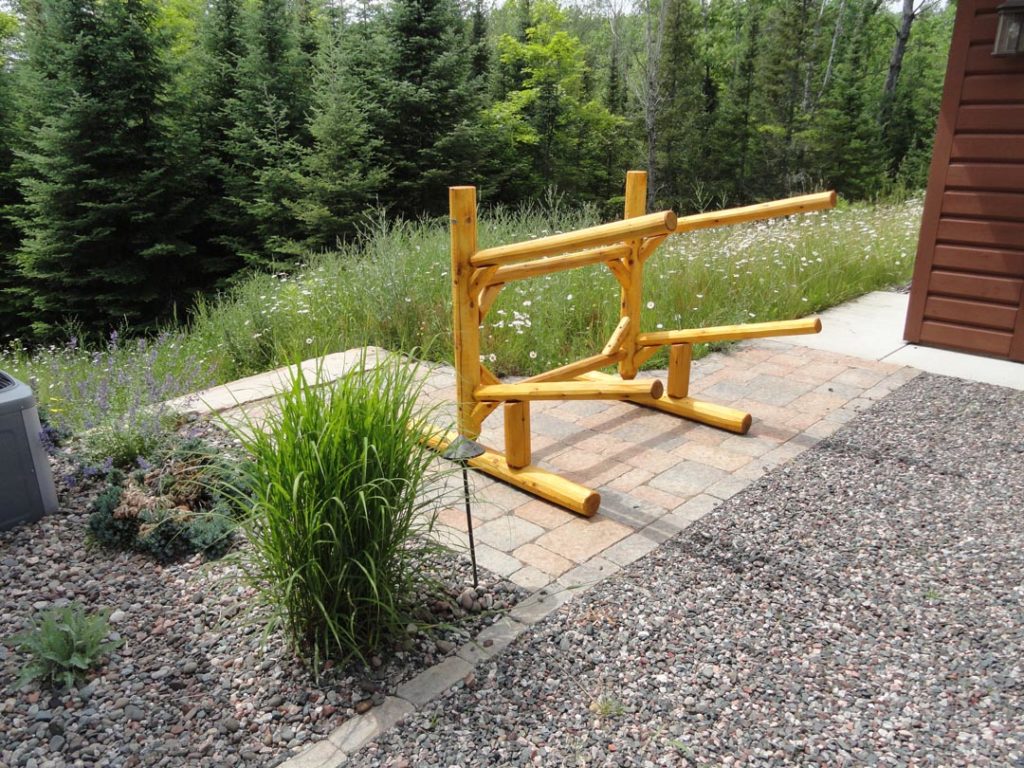
Log Kayak Rack handcrafts heavy-duty kayak, canoe, and stand-up paddle board (SUP) storage racks from northern white cedar logs. Our kayak racks can be shipped free of charge anywhere in the continental United States and hassle-free to Canada. When your package arrives, it will be unassembled in a box. Assembly is easy and can be done in less than an hour.
What You Need to Assemble Your Log Kayak Rack
You will find assembly instructions along with most of the materials you need inside the box.
Each kayak rack comes with:
- Feet, Cross Rails, Legs, Upper and Lower Arms, and Lower Support Posts (all labeled)
- Instruction Pack
- 3 Inch GRK Screws
- 4 Inch GRK Screws
- Two Tips, Green and Black for Drill or Screw Gun (in the bag with 3 inch screws)
- Decking Screws
- Glue
Materials needed, but not Included:
- Rubber Hammer/Mallet
- Power Drill or Screw Gun
- Gloves (optional)
Assembling Your Log Kayak
Once you’ve gathered all the necessary materials, it’s time to start putting your Log Kayak Rack together. We have created several assembly videos to assist. You can watch them here and follow along.
Step 1. Open the box up and unpack materials
Remove the feet, cross rails, legs, upper and lower arms. You will have a different number depending on what size and style rack you purchased, but the assembly follows the same basic instructions. You will also find an instruction pack that has all the screws and glue you will need to complete the assembly.
Step 2. Ready the posts
Grab the parts labeled posts. They are the ones with tenon or protruding end and located the angled holes and apply glue to the inside, wiping around with your finger or glove. Repeat for the second post and place on the floor along a wall that you can use for support.
Step 3. Put the arms in
Start with the pieces labeled lower arms. They will have one hole drilled in the top. Slip them into the glued hole on the post and tap with hammer. Lean it against the wall and then repeat with the top arms.
Then you’ll secure the arms with screws. You’ll need either a drill or ratchet for this part. First, you’ll use the 4-inch GRKs and the black tip to screw the base of each arm to the post. Then, using the green tip and the deck screws, you’ll put two more screws into each arm, one from each side of the post. Repeat for the other side.
Step 4. Connect the base
Now that the sides are done, you’ll want to lay them out on the floor how they are going to go with space for the base in between. Grab the feet or bases and just like you did for the posts, circle the glue around in the hole and wipe it around with your finger or glove.
Then with the longer side under the arms, slip the post into the hole and use the hammer to secure. And do the same thing with the other foot.
5. Attach the cross rails
Start by applying glue to the rail holes in both of the posts. Grab the piece labeled upper rail. Slip it into the upper hole of one of the posts and secure with a 4-inch GRK screw, using the black tip on your drill. Then grab the piece labeled lower rail, slip it into the glued hole and again secure with a 4-inch GRK screw using your drill.
Go ahead and stand that side of the rack up and attach the cross rails to the other post, putting the upper rail in the upper hole and the lower rail in the lower rail. Center them on the post and secure using two more GRK screws.
6. Screw the posts to the feet and add supports
First make sure the base is lined up, tapping it back and forth until the base is parallel with the arms and it’s square on the back. Then put the 3-inch GRKs into the base, one on each side.
Next, you’ll put in the bottom support post, tapping it in and making sure it’s square on the back of the post. Then screw in place from the top with one of the GRK screws and at the bottom with three of the decking screws. Repeat for the other side and now your log kayak rack is complete.
Step 7. Enjoy
Naturally weather resistant, our kayak storage systems will keep your equipment lasting longer, your property looking cleaner, and get you back out on the water faster. Shop our full selection of free-standing, ground buried, wall-mounted and dock-mounted single and multi-kayak racks online now. If you have any questions or concerns while assembling your kayak storage rack, give us a call at 1-715-543-2006. We’d be more than happy to help you through the process.